How to Run HDMI Through Wall: Step-by-Step Guide
Published: 10 Oct 2025
Running an HDMI cable through your wall can make your room look clean and organized. No more messy wires hanging behind your TV or entertainment setup. In this guide, you will learn how to run HDMI through wall safely and easily.
Whether you’re setting up a home theater, a wall-mounted TV, or just want to hide your cables, this blog will help you do it step by step in straightforward language.
Why to Run HDMI Through the Wall?
Here are some good reasons why many people choose to run HDMI cables through the wall:
- Neat and Clean Look: Hides all messy wires for a tidy setup.
- Safe for Kids and Pets: Cables stay out of reach and protected.
- No Tripping Hazards: No wires on the floor means fewer accidents.
- Protects Cables: Cables last longer when hidden inside the wall.
- Better Setup Design: Looks smart and modern, especially for wall-mounted TVs.
- More Free Space: No extra wires taking up space around your TV or table.
- Reduces Signal Interference: Inside walls, cables are less likely to get disturbed by other electronics.
- Keeps Things Organized: Makes your media corner or home theater setup look professional.
- Adds Property Value: A clean and built-in cable setup can impress future home buyers.
- No Dust Around Cables: Exposed cables often collect dust. Wall-running prevents that.
What You Need Before You Start
Here’s a quick list of tools and items you must have before starting:
- In-Wall Rated HDMI Cable: Safe to run inside walls (CL2 or CL3 rated).
- Correct Cable Length: Make sure it’s long enough to reach both ends easily.
- HDMI Wall Plates: For a clean and professional look on the wall.
- Drill and Drill Bits: To make holes for cable and wall plates.
- Drywall Saw or Utility Knife: Helps in cutting wall holes neatly.
- Fish Tape or Cable Puller: Makes it easier to pass the cable through the wall.
- Tape Measure: For measuring distance and marking drill spots.
- Pencil or Marker: To mark where to cut or drill.
- Screwdriver: To fix wall plates or cable covers.
- Stud Finder (Optional): Helps avoid hitting wall studs or pipes.
- Cable Cover (Optional): If you don’t want to drill, this hides cables on the wall surface.
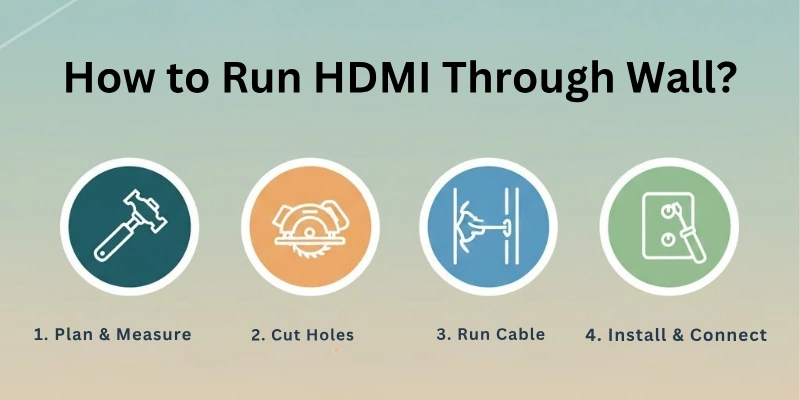
Step-by-Step: How to Run HDMI Through Wall
Follow these simple steps to run your HDMI cable through the wall safely and neatly:
Step 1: Plan Your Cable Path
- Decide where the HDMI cable will start (like your TV) and where it will end (like your DVD player or gaming console).
- Use a tape measure to check the distance.
- Make sure there are no studs, water pipes, or wires in the way.
Tip: Use a stud finder to check inside the wall before cutting.
Step 2: Mark the Wall
- Use a pencil or marker to draw small marks where you’ll place the wall plates or cut holes.
- Make sure the marks are at the right height and straight.
Step 3: Cut Holes in the Wall
- Use a drywall saw or utility knife to cut neat holes where you marked earlier.
- Cut a hole behind your TV and another near the device (e.g., media box).
Note: The hole should match the size of your wall plate or cable pass-through box.
Step 4: Pass the Cable Through the Wall
- Use a fish tape or cable puller to help guide the HDMI cable through the wall from one hole to the other.
- Pull the cable gently to avoid damage.
Optional Tip: Tape the HDMI cable securely to the fish tape before pulling.
Step 5: Attach the Wall Plates
- Once the cable is pulled through, connect both ends to the HDMI wall plates.
- Use a screwdriver to fix the plates to the wall.
Step 6: Connect Your Devices
- Plug the HDMI cable into your TV on one side and into your device (like a Blu-ray player, gaming console, or laptop) on the other side.
- Make sure everything is working correctly.
Step 7: Clean Up and Test
- Tidy up the area around the wall.
- Turn on your devices and check if the video and audio are working smoothly.
- If everything is fine — congratulations! You’ve done a neat job.
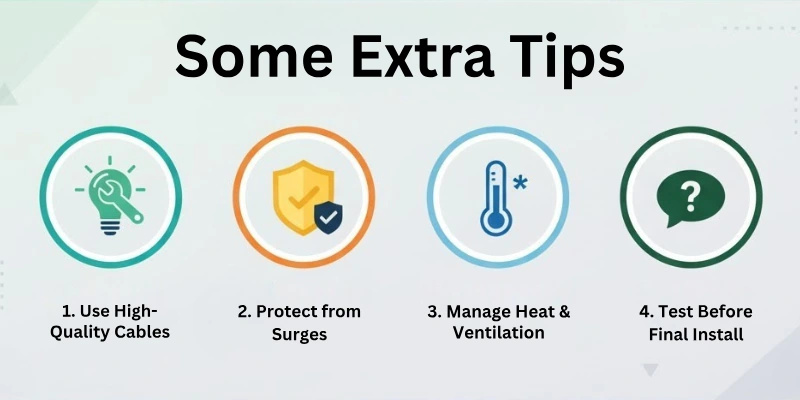
Some Extra Tips
Here are a few more smart tips to help you with a better setup:
- Use Cable Management Clips: If you have extra cable outside the wall, use small clips or holders to keep them neat and in place.
- Choose HDMI 2.0 or Higher: If you want better picture quality (like 4K or 8K), try to use HDMI 2.0 or HDMI 2.1 cables for faster data transfer.
- Leave Extra Cable Behind Wall Plates: Leave a little extra cable behind each wall plate. This helps in future if you want to remove or replace it easily.
- Use an HDMI Extender for Long Distance: If your cable is going very far (over 50 feet), use an HDMI extender with Cat6 or fiber cable to avoid signal loss.
- Label Both Ends of the Cable: Write a small label or tag on both ends of the cable. This will help you identify cables quickly later.
- Use a Grommet Insert (Optional): If you’re not using wall plates, install grommet inserts (soft rubber rings) in the wall holes to protect the cable from sharp edges.
- Keep a Backup Cable: Keep one extra HDMI cable at home in case your main one stops working suddenly.
Common Mistakes to Avoid
While running HDMI through the wall is a great idea, many people make small mistakes that can cause trouble later. Here are some common mistakes you should avoid:
- Using the Wrong Type of HDMI Cable: Always use in-wall rated (CL2 or CL3) HDMI cables. Regular cables are not safe and may get damaged or even cause fire hazards.
- Choosing the Wrong Cable Length: If the cable is too short, it won’t reach. If it’s too long, it may get tangled inside the wall. Measure the distance properly before buying.
- Skipping the Stud Finder Check: Drilling or cutting without checking for studs, wires, or pipes can be dangerous. Always check inside the wall first.
- Cutting the Wall Wrongly: Many people cut holes that are too big or uneven, which looks untidy and may not fit wall plates properly. Mark and measure carefully before cutting.
- 5. Pulling the Cable Too Hard: Pulling the cable with force can damage its internal wires. Always pull gently and smoothly using fish tape or cable pullers.
- Installing Near Electrical Wires: Running HDMI too close to power cables can cause signal interference. Keep a safe distance between HDMI and electrical lines.
- Not Testing the Cable First: Before fixing everything in place, always test the HDMI cable with your TV and device to make sure it works fine.
- Not Leaving Extra Cable Slack: Tightly pulled cables can break or make future adjustments hard. Leave a little extra cable behind the wall plates for safety and future use.
- Forgetting to Label the Cable: If you’re running more than one cable, not labeling them can be confusing later. Use small tags or stickers to mark each end.
- Not Using Wall Plates or Grommets: Leaving raw holes without wall plates or grommet rings can damage the cable over time and look unprofessional.
Troubleshooting HDMI Wall Cable Problems
After installation, if something goes wrong, users will need quick help.
| Problem | Possible Cause | Solution |
| No Signal on TV | Loose connection or cable not plugged in properly | Check both ends of HDMI cable and ensure they are firmly connected. |
| Poor Picture or Flickering Screen | Damaged cable or low-quality HDMI cable | Replace with a high-quality, in-wall rated HDMI 2.0 or 2.1 cable. |
| Audio Not Working | TV or device settings issue | Check audio settings in your TV or media device menu. Try another HDMI port. |
| Signal Drops Often | HDMI cable too close to electrical wires | Reroute the HDMI cable away from power lines to reduce interference. |
| Cable Not Reaching Properly | Wrong cable length used | Replace with a longer cable. Always measure before buying. |
| HDMI Wall Plate Not Working | Loose internal connection behind the wall plate | Remove wall plate and re-check cable connection behind it. |
| Picture Quality is Blurry | Using an older HDMI version (1.4 or below) | Upgrade to HDMI 2.0 or HDMI 2.1 for better video quality. |
| TV Shows “No Input” | Wrong HDMI input selected on TV | Use your remote to select the correct HDMI source/input number. |
| Signal Works Intermittently | Cable may be damaged during wall pull | Test the cable with other devices. Replace if needed. |
| Can’t Pull Cable Through Wall | Obstacles inside wall like studs or insulation | Use fish tape carefully or try a different wall path. |
Alternative Methods (For Those Who Don’t Want to Cut Walls)
Not everyone feels comfortable cutting holes in the wall — and that’s totally okay!
Here are some easy and smart alternative ways to hide or manage your HDMI cables without drilling or cutting anything:
| Method | What It Is | How It Helps |
| Cable Raceway / Cable Cover | A plastic or metal channel that sticks to the wall surface. | Hides cables neatly on the wall. Paintable to match your wall color. |
| Flat HDMI Cables | Special flat-designed HDMI cables. | Can be run under carpets, rugs, or along the wall edges easily. |
| Adhesive Cable Clips or Hooks | Small clips with sticky backs to hold cables. | Keeps cables attached along baseboards, walls, or furniture. |
| Decorative Fabric Cable Covers | Soft fabric sleeves that hold multiple cables inside. | Blends well with home decor and keeps cables tidy. |
| Use Furniture to Hide Cables | Route cables behind TV stands, shelves, or side tables. | Easy and cost-free solution to keep cables out of sight. |
| Wireless HDMI Transmitter | Sends HDMI signal wirelessly from one device to another. | No cable needed at all! Great for clean setups, but can be expensive. |
| Behind-the-TV Cable Boxes | Small boxes to manage cable mess behind the TV. | Helps you organize extra cable length without visible clutter. |
Note: These options are perfect for renters, people who frequently move homes, or those who simply want a hassle-free cable setup.
Cost Estimate
A quick overview of the average cost can help readers plan better. Here’s a simple cost breakdown of what you may need for running HDMI through the wall:
| Item | Estimated Cost (USD) | Notes |
| In-Wall Rated HDMI Cable (6–25 ft) | $10 – $30 | Choose CL2 or CL3 rated cables. Price depends on length and quality. |
| HDMI Wall Plates (Pair) | $10 – $20 | Optional but gives a neat and professional look. |
| Fish Tape or Cable Puller | $10 – $25 | Helpful tool for pulling cable through the wall. |
| Drywall Saw / Utility Knife | $5 – $15 | Used for cutting holes in drywall. |
| Drill & Drill Bits | $20 – $50 | Most homes already have this. Borrow if needed. |
| Screwdriver Set | $5 – $15 | Basic tool to fix wall plates. |
| Stud Finder (Optional) | $10 – $25 | Helps you avoid pipes, wires, and studs. |
| Cable Clips or Cable Cover (Optional) | $10 – $20 | For surface cable management if you skip wall cutting. |
Estimated Total Cost: $50 – $120 (depending on tools you already have and cable length)
Money-Saving Tip: If you already have basic tools like a drill, screwdriver, or saw, your cost can drop significantly — maybe under $40 just for the cable and wall plates.
Conclusion
In this guide on how to run HDMI through wall, we covered everything from planning and tools to step-by-step installation and troubleshooting.
Running HDMI cables through walls helps create a clean and organized setup while protecting your cables from damage. You can achieve a professional-looking installation without hassle by following the right methods and safety precautions. If you ever plan to upgrade or add more cables, keeping future flexibility in mind will save you time and effort.
Now that you know the process, go ahead and set up your home theater or entertainment system the right way!
FAQs
Here are some of the most commonly asked questions related to getting HDMI through walls:
It’s not a good idea to run HDMI cables very close to power cables. The electrical current in power wires can create interference and affect the signal quality of your HDMI cable. Try to keep at least 6 inches of space between the HDMI and power cables.
If you think you’ll need more cables in the future, it’s best to plan ahead now. You can install a larger wall plate with extra ports or run a flexible conduit pipe inside the wall. This way, you can easily add more cables later without cutting the wall again.
Yes, it’s safe if you follow proper steps and take some precautions. Always use a stud finder to avoid hitting electrical wires, water pipes, or wall studs. Mark your spots carefully and cut slowly with the right tools.
You can use an old HDMI cable, but it may not support newer devices and high-resolution video like 4K or 8K. Older cables may also wear out easily or have a weaker signal, especially over long distances. For best results, use a good quality in-wall rated HDMI 2.0 or higher cable.
Measure the distance between your devices carefully before choosing a cable. Always add a few extra feet to allow flexibility and easy connections. Most people use cables between 6 to 25 feet for a regular TV setup. If the distance is more than 50 feet, consider using an HDMI extender to avoid signal loss.
Yes, this setup works great for projectors too. You can run the HDMI cable through the wall or ceiling from your media source to the projector. Just make sure to measure the distance carefully and choose the correct cable length.


- Be Respectful
- Stay Relevant
- Stay Positive
- True Feedback
- Encourage Discussion
- Avoid Spamming
- No Fake News
- Don't Copy-Paste
- No Personal Attacks
- Be Respectful
- Stay Relevant
- Stay Positive
- True Feedback
- Encourage Discussion
- Avoid Spamming
- No Fake News
- Don't Copy-Paste
- No Personal Attacks
