How to Extend Display Using HDMI on Any Device
Published: 1 Sep 2025
In many how-to guides, you must have seen the words like “extend HDMI display”. If you’re confused about what it really means, don’t worry!
In the next few lines, I’ll explain what “extend HDMI” actually means in simple words. Then, we’ll walk you through a step-by-step guide on how to extend display using HDMI.
What Does “Extend Display” Mean?
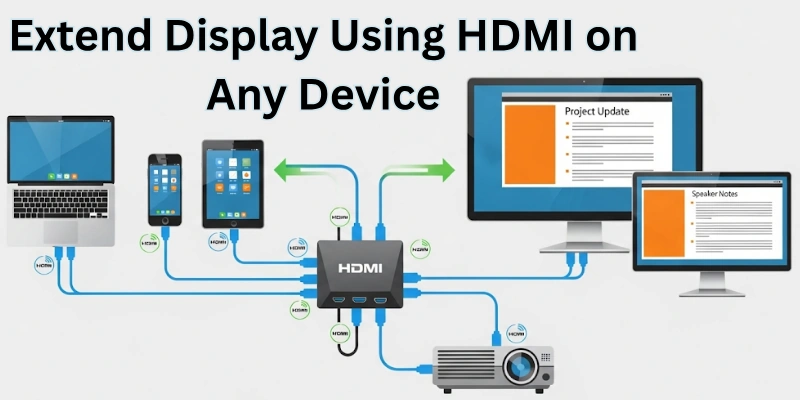
When we say “extend display,” it simply means using a second screen to create extra space on your desktop. You don’t see the same thing on both screens — each screen shows different content. This is helpful when you want to work on one screen and watch something or open another file on the second screen.
With an HDMI cable, you can easily connect your laptop to a second screen like a TV or monitor and extend your display for better multitasking.
What You Need Before You Start
Before you begin extending your display using HDMI, make sure you have the following items ready:
- A Laptop or Desktop Computer – This is your main device from which you will extend the display.
- A Second Screen – This can be a TV, computer monitor, or even a projector. It will work as your extended display.
- An HDMI Cable – This cable connects your computer to the second screen. It transfers both video and audio signals.
- HDMI Ports on Both Devices – Make sure your computer and the second screen have an HDMI port. It looks like a flat, wide port.
Optional: Adapter or Converter – If your laptop doesn’t have an HDMI port (some newer laptops only have USB-C or older ones have VGA), you’ll need an adapter like:
- USB-C to HDMI
- VGA to HDMI
- DisplayPort to HDMI
Using the right cable and adapter ensures everything works smoothly without display errors.
How to Extend Display Using HDMI – Step-by-Step
Follow these simple steps to successfully extend your display using an HDMI cable:
Step 1: Connect the HDMI Cable
Take your HDMI cable and connect one end to your laptop or computer and the other end to your second screen (TV, monitor, or projector). Make sure both ends are firmly connected in the HDMI ports.
Step 2: Turn On Both Devices
Turn on your laptop or PC, and also turn on the second screen. After a few seconds, your computer may automatically detect the new screen. If not, don’t worry — you can do it manually in the next step.
Step 3: Detect the Second Screen
For Windows 10 & Windows 11:
- Right-click on the desktop and select “Display Settings.”
- Scroll down and click “Detect” if the second screen is not showing up.
- Wait a few seconds — your system will try to find and display the second screen.
For macOS (MacBook/iMac):
- Click the Apple Menu () in the top-left corner and go to “System Settings” or “System Preferences.”
- Select “Displays.”
- Click on “Display Settings” (in newer macOS versions).
- If the second screen is connected, it will appear here.
- Choose “Use As: Extended Display.”
- You can also arrange the display layout by dragging the screen boxes.
Tip: If the display is not detected, click the “Detect Displays” button (available in older macOS versions).
For Chromebook:
- Click the time area (bottom-right corner) and then click the gear icon (⚙) to open Settings.
- Go to Device → Displays.
- If your second screen is connected via HDMI, it should appear here.
- Choose “Extend screen” instead of “Mirror” if you want to use it as a separate display.
- You can also drag to arrange the screen positions here.
Note: Most new systems detect it automatically when both screens are on and the cable is properly connected.
Step 4: Change Display Settings
- In the Display Settings window, scroll to the section called “Multiple Displays.”
- Click on the dropdown menu and select “Extend these displays.”
- Click on Apply to save the settings.
- Now, you will have two separate screens — one as your main screen and the other as extended space.
Step 5: Arrange the Displays
- In the same Display Settings window, you’ll see screen numbers like 1 and 2.
- You can drag and place them (left or right) based on how your physical screens are placed on your desk.
- This helps you move your mouse and windows smoothly between the two screens.
Tip: Click “Identify” to know which number belongs to which screen.
Why Do People Extend Their Displays?
You might be wondering — what’s the need to extend a display using HDMI? Here are some common reasons why people do it:

1. More Screen Space: When you extend your display, you get a second screen where you can open more apps, files, or browser tabs. It’s like adding extra space to your digital desk.
2. Multitasking Made Easy: People love extended screens because they can do multiple tasks at the same time. For example, you can watch a video on one screen while taking notes on the other.
3. Better Work Flow: Designers, writers, coders, and office workers often extend displays to boost their work speed and focus. It helps them manage documents, emails, and tools more smoothly.
4. Presentations and Meetings: Extended displays are also helpful during meetings. You can keep your notes on your laptop and show only the important slides on the second screen.
5. Entertainment & Gaming: Gamers and movie lovers use extended displays for a better visual experience — some even play games on one screen and chat or stream on the other.
6. Online Classes or Training: Many students and trainers use extended displays to take online classes on one screen and practice or take notes on the second one.
Common Problems and How to Fix Them
Sometimes, things don’t go smoothly while setting up an extended display. Don’t worry — here are some common issues people face and easy ways to fix them.
1. Second Screen Not Detected
Fix:
- Make sure the HDMI cable is properly connected on both ends.
- Click “Detect” in your Display Settings (Windows) or “Detect Displays” on Mac.
- Restart your computer and second screen.
- Try plugging the HDMI cable into another port (if available).
2. No Sound on Second Screen
Fix:
- Sometimes, sound stays on your laptop instead of moving to the second screen (like a TV).
- On Windows, go to Control Panel → Sound → Playback tab.
Select the HDMI or TV audio option, then click Set Default. - On Mac, go to System Settings → Sound → Output, and select your HDMI device.
3. Wrong Screen Resolution
If things look too big or too small on your second screen:
- On Windows, go to Display Settings → Display Resolution, and choose the recommended resolution.
- On Mac, go to System Settings → Displays, and select “Default for Display” or adjust manually.
4. Black Screen on Second Display
Fix:
- Make sure the second screen is turned on and set to the correct HDMI input.
- Reconnect the cable and restart your laptop and monitor/TV.
- Try a different HDMI port or cable if the screen stays black.
5. HDMI Cable Not Working
Fix:
- Check for any visible damage on the cable.
- Try using a different HDMI cable or test the same cable on another device to confirm.
- Sometimes, low-quality or old cables don’t support high resolution or dual display properly.
Tips to Improve Your Display Setup
Want to get the best experience from your extended display? Here are some easy tips that can help you improve your screen setup:
1. Use a Good Quality HDMI Cable
- A strong, high-quality HDMI cable ensures better picture and sound.
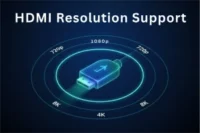
- Try using HDMI 2.0 or HDMI 2.1 cables (new version is also launching) — they support higher resolutions and faster refresh rates, which give you a smoother display.
- Cheap or old cables may cause screen flickering or no signal at all.
2. Adjust the Screen Resolution
- Always check and set the recommended resolution for your second screen.
- Right resolution gives you sharp and clear visuals.
- You can change it in Display Settings (Windows) or Displays (macOS).
3. Use HDMI to VGA Adapter (for Old Monitors)
- If your second screen is an old monitor with only a VGA port, don’t worry!
- You can use an HDMI to VGA adapter to connect your laptop easily.
- It’s an affordable solution to reuse your older display.
4. Use Display Splitter or Extender (for More Screens)
- Use a Display Splitter or HDMI Extender — these tools help you connect multiple screens from one HDMI port.
- Great for multitasking or advanced work setups like gaming or editing.
Recommended HDMI Splitters or Extenders
If you want to connect more than one extra screen, you’ll need a reliable HDMI splitter or display extender. Here are some beginner-friendly options to consider:
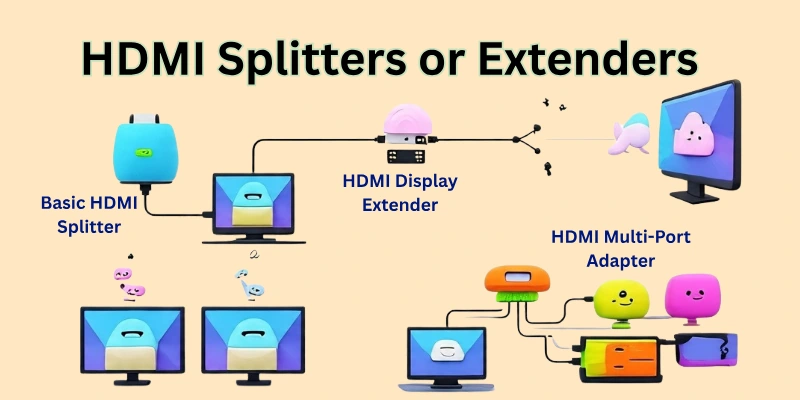
Basic HDMI Splitter (1 In → 2 Out):
- Good for showing the same screen on two displays (mirror mode).
- Example: Techole 1×2 HDMI Splitter, Ugreen HDMI Splitter 1 in 2 out
- Perfect for presentations or dual display TV setups.
HDMI Display Extender (for Long Cable Runs):
- Use this if your second screen is far from your laptop (like across the room).
- Example: J-Tech Digital HDMI Extender over Cat6/Cat7 Ethernet Cable
- It extends HDMI signals up to 100ft or more without signal loss.
HDMI Multi-Port Adapter (Hub with 3–4 ports):
- If your laptop has only one HDMI port, try a USB-C to HDMI Multiport Adapter or HDMI Hub.
- Example: Anker USB-C Hub with HDMI, QGeeM 4K HDMI Adapter
- Great for connecting multiple devices and displays at the same time.
Note: If your goal is to extend the display (not duplicate it), make sure to choose a display adapter or hub that supports extended display mode, not just mirroring.
Conclusion
In this article, we learned what it means to “extend a display using HDMI” and how to set it up step by step.
Whether you’re working, studying, or enjoying entertainment, a second screen can make your tasks easier and faster. With just an HDMI cable, correct settings, and a few helpful tools, you can expand your digital space in minutes. Personally, I recommend trying it once — you’ll feel the difference in your productivity and comfort right away.
Have any questions or faced an issue while setting up? Drop your question in the comments — I’d love to help you out!
FAQs
Here are some of the most commonly asked questions related to “How to Extend Displaying with HDMI”:
Yes, you can easily extend your display using just an HDMI cable. You don’t need any extra software or tools. Just connect your laptop or PC to another screen using the HDMI cable. Then change the display setting to “Extend display” from your computer.
Most laptops allow you to connect and extend one extra screen using an HDMI port. Some desktop computers can support more if they have multiple HDMI or display ports. To add more screens, your computer should have more display outputs. You cannot extend many displays using only one HDMI port.
No, you don’t need to install any special software. Your computer already has built-in display settings to extend the screen. You just need to open the display settings and select the option to “Extend these displays.” It’s a very simple and quick process.
No, an HDMI splitter is not made for extending display. It shows the same screen (duplicate display) on both monitors. If you want different content on each screen, you need separate display ports (like HDMI, VGA, or USB-C). A splitter is good for mirroring, not extending.
If your laptop doesn’t have an HDMI port, don’t worry. You can use an adapter like USB-C to HDMI, VGA to HDMI, or DisplayPort to HDMI based on what ports your laptop has. These adapters work well and let you connect to another screen easily. Just plug in the adapter and follow the same display settings steps.
Yes, HDMI carries both video and sound together. When you connect your HDMI cable, your audio may automatically shift to the new screen. If there’s no sound, check your sound settings and select the correct audio output (HDMI). Make sure your TV or monitor also supports sound.


- Be Respectful
- Stay Relevant
- Stay Positive
- True Feedback
- Encourage Discussion
- Avoid Spamming
- No Fake News
- Don't Copy-Paste
- No Personal Attacks
- Be Respectful
- Stay Relevant
- Stay Positive
- True Feedback
- Encourage Discussion
- Avoid Spamming
- No Fake News
- Don't Copy-Paste
- No Personal Attacks
