How to Connect HDMI to Projector: Simple HDMI Connection Guide
Published: 3 Sep 2025
Are you wondering how to connect HDMI to projector? Don’t worry — it’s easier than you think.
HDMI is the most common and simple way to connect your laptop, phone, or TV to a projector. It sends both audio and video through one cable, making everything quick and smooth.
In this guide, you’ll learn step-by-step how to connect HDMI cable from laptop to projector, phone, tablet, MacBook, iPhone, and other devices.
What You Need Before Connecting HDMI to Projector?
Before learning how to connect HDMI to projector, make sure you have the right things ready. Here’s a simple checklist of what you’ll need:
A Projector with an HDMI Port: Your projector must have an HDMI input port. Most modern projectors already have it. If your projector doesn’t have an HDMI port, don’t worry — we’ll also share other ways later in this guide.
An HDMI Cable: You need an HDMI cable to make the connection. There are different types of HDMI cables: Standard HDMI, Mini HDMI or Micro HDMI. Make sure your cable matches your device’s port.
A Source Device: This is the device you want to connect to the projector. It can be: Laptop, Phone (Android or iPhone), Tablet or iPad, MacBook, TV, DVD Player, or Gaming Console.
Adapters or Converters (if needed): Some devices don’t have a built-in HDMI port. In that case, you’ll need:
- USB-C to HDMI adapter (for some laptops, phones, or tablets)
- Lightning to HDMI adapter (for iPhones and iPads)
- HDMI switch or splitter (if you want to connect multiple devices)
Once you have everything ready, you can easily follow the next steps to connect HDMI to projector and enjoy videos, presentations, or games on a big screen.
How to Connect Laptop to Projector with HDMI?
Connecting your laptop to a projector is quick and easy with an HDMI cable. Whether you’re using a regular projector or an Epson projector, follow these simple steps to get started.
Step 1: Plug in the HDMI Cable
- Take one end of the HDMI cable and plug it into your laptop’s HDMI port.
- Plug the other end into the projector’s HDMI port (For example: on an Epson projector, it’s usually labeled as “HDMI 1” or “HDMI 2”).
Tip: If your laptop doesn’t have an HDMI port, you can use a USB-C to HDMI adapter.
Step 2: Turn on Both Devices
- Turn on your laptop and projector.
- Make sure the HDMI cable is properly connected to both.
Step 3: Select the Correct HDMI Input on Projector
- Use the remote control or buttons on the projector to select the correct input source.
- Choose “HDMI” or “HDMI 1/HDMI 2” depending on where you plugged in the cable.
Example: For Epson projectors, press the “Source Search” button or Input/HDMI to select the correct HDMI source.
Step 4: Adjust Display Settings on Laptop
On your Windows laptop, follow these steps to manage how the screen appears on the projector:
- Right-click on your desktop → Select “Display settings”.
- Scroll down and click “Multiple displays”.
- Choose one of the following options: Duplicate screen – Same display on both projector and laptop. Extend screen – Use the projector as a second screen. Second screen only – Show the display only on the projector.
Shortcut: Press Windows + P to switch between display modes quickly.
Step 5: Adjust Resolution (if needed)
Sometimes, the display might look stretched or blurry. You can adjust it by:
- Going to Display Settings → Resolution.
- Choose the recommended resolution for your projector.
Common Problems and Solutions
Some quick fixes if you face any problems while connecting:
| Problem | Solution |
| No display on projector | Check HDMI cable, input source, restart both devices |
| Projector shows “No Signal” | Ensure correct HDMI port is selected |
| Display is blurry or cut off | Adjust display resolution |
| No sound | Right-click volume icon → Select Playback Devices → Choose HDMI output |
How to Connect MacBook to Projector with HDMI?
Whether you’re using your MacBook for a presentation, watching a movie, or teaching a class, connecting it to a projector with HDMI is simple.
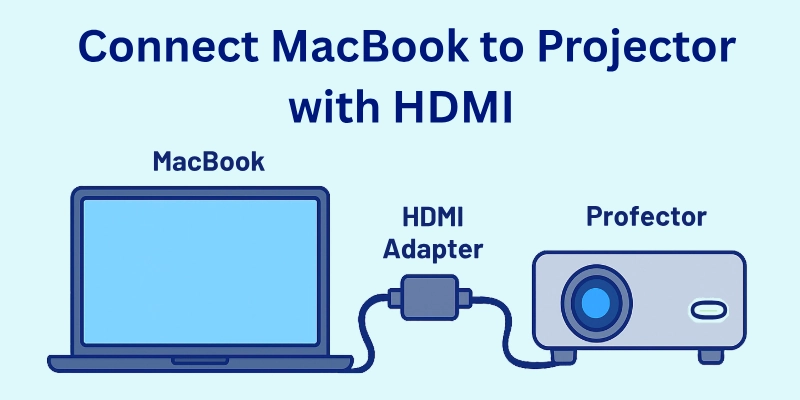
Follow these easy steps to get started.
Step 1: Check HDMI Ports on Your MacBook
- Older MacBooks (like MacBook Pro models before 2016) may already have a built-in HDMI port.
- Newer MacBooks usually have USB-C or Thunderbolt ports instead of a standard HDMI port.
In this case, you’ll need a USB-C to HDMI adapter to make the connection.
Step 2: Connect the HDMI Cable
- Plug the HDMI cable into your projector’s HDMI port.
- Then, connect the other end of the HDMI cable to your MacBook: If your MacBook has an HDMI port, plug it in directly. If not, use a USB-C to HDMI adapter, then plug the HDMI cable into the adapter.
Step 3: Turn on the Projector and Select HDMI Input
- Power on the projector.
- Use the remote control or on-screen menu to choose the correct HDMI input (HDMI 1, HDMI 2, etc.).
Tip: Some projectors may switch to HDMI automatically once a signal is detected.
Step 4: Adjust Display Settings on macOS
Once connected, your MacBook should detect the projector automatically. If it doesn’t, follow these steps:
- Go to the Apple menu → System Settings (or System Preferences in older macOS versions).
- Click Displays.
- You will see two display panels — your MacBook screen and the projector screen.
- Choose how you want to use the projector: Mirror Display – Show the same screen on both MacBook and projector. Extend Display – Use the projector as a second screen (helpful for presentations or multitasking).
You can also click “Arrangement” to drag and position screens or enable/disable mirroring.
Optional: Set Audio Output to HDMI
If you also want sound to come from the projector’s speaker:
- Go to System Settings > Sound > Output.
- Select HDMI or Projector Audio as the output device.
Common Problems and Solutions
Here are a few simple fixes if something goes wrong:
| Problem | Solution |
| No display on projector | Check adapter, HDMI cable, and input source |
| MacBook doesn’t detect projector | Click “Detect Displays” in Display Settings |
| Display not mirrored | Enable “Mirror Displays” from settings |
| No sound | Change sound output to HDMI under Sound Settings |
How to Connect Phone to Projector with HDMI?
You can easily connect your Android phone to a projector using an HDMI cable. Here is how:
Step 1: Check Your Phone’s HDMI Compatibility
Most Android phones do not have a direct HDMI port. But many modern phones support video output through USB-C (also called DisplayPort over USB-C).
To connect via HDMI, your phone must support video output through USB-C.
Step 2: Get the Right Adapter
To connect your phone to the projector, you’ll need a suitable adapter or cable:
- USB-C to HDMI adapter (for most Android phones)
- Micro USB to HDMI (MHL cable) (for older phones that support MHL technology)
Make sure your phone model supports HDMI output or MHL before buying the adapter.
Step 3: Connect Everything
- Plug the HDMI cable into the projector’s HDMI port.
- Connect the other end to your USB-C to HDMI adapter.
- Plug the adapter into your Android phone.
Some adapters may require external power via USB charger, especially for older phones using MHL cables.
Step 4: Enable Screen Mirroring on Your Phone
In most cases, your phone screen will automatically show on the projector once connected. If not:
- Go to Settings > Display > Cast/Screen Mirroring/Smart View (depending on phone model).
- Some phones also have a screen mirroring toggle in the quick menu (swipe down from top of the screen).
No additional apps are needed if you’re using a physical HDMI connection.
Common Issues and Solutions
Before you panic, try these simple solutions:
| Problem | Solution |
| No signal on projector | Recheck cable connections and projector input |
| Phone not detected | Ensure adapter is compatible with your phone |
| Screen doesn’t show | Try enabling screen mirroring manually |
| No audio on projector | Go to phone’s sound settings > Set audio output to HDMI (if available) |
How to Connect iPhone or iPad to Projector with HDMI?
Connecting your iPhone or iPad to a projector with an HDMI cable is very simple. Just follow these steps:
Step 1: Get a Lightning to HDMI Adapter (Apple Digital AV Adapter)
To connect an iPhone or iPad to a projector, you’ll need:
- Apple Lightning Digital AV Adapter (for devices with a Lightning port): This adapter has two ports: one for HDMI and one for charging (Lightning).
Make sure to buy an original or certified Apple adapter for best performance. For newer iPad Pro models (with USB-C port), use a USB-C to HDMI adapter instead.
Step 2: Connect Everything Together
- Plug the HDMI cable into the projector’s HDMI port.
- Plug the other end of the HDMI cable into the Lightning Digital AV Adapter.
- Connect the adapter to your iPhone or iPad.
You can also connect a charger to the adapter’s Lightning port to keep your iPhone or iPad charged while using the projector.
Step 3: Turn On the Projector and Select HDMI Input
- Turn on the projector.
- Use the remote or on-screen menu to select the correct HDMI input source (e.g., HDMI 1 or HDMI 2).
- Your iPhone or iPad screen should appear on the projector automatically.
Step 4: Tips for iOS Screen Mirroring
- Your iPhone or iPad will mirror the entire screen—no extra settings are usually needed.
- Everything you do on your device (apps, videos, presentations, etc.) will be shown on the projector.
- Some video apps (like Netflix, YouTube, etc.) may require you to rotate your device horizontally for full-screen display.
Common Issues and Solutions
Here’s what to do if things aren’t connecting properly:
| Problem | Solution |
| No display on projector | Check HDMI cable and adapter connection |
| iPhone/iPad not detected | Restart both devices and reconnect |
| No sound from projector | Check projector volume and set audio to HDMI |
| Poor video quality | Use original Apple adapter and high-quality HDMI cable |
How to Connect Tablet to Projector via HDMI?
Learn how to use projector with HDMI on Android tablet or a Windows tablet.
Step 1: Check Your Tablet’s HDMI Support
Most tablets don’t have a full-size HDMI port, so you’ll need to check what kind of port your tablet has:
- USB-C port (common in modern Android and Windows tablets)
- Micro HDMI or Mini HDMI port (older models)
- Proprietary port (some Windows tablets like Surface)
Not all tablets support HDMI output. Check your tablet model’s specs to confirm.
Step 2: Choose the Right Cable or Adapter
Depending on the type of tablet, choose one of the following:
- USB-C to HDMI adapter – for most modern Android and Windows tablets
- Micro HDMI to HDMI cable – if your tablet has a Micro HDMI port
- Mini HDMI to HDMI cable – if your tablet has a Mini HDMI port
- Surface Dock or HDMI adapter – for Microsoft Surface tablets
Always use good-quality, certified adapters or cables for a stable connection.
Step 3: Connect the Devices
- Plug the HDMI cable into the projector’s HDMI port.
- Connect the other end of the cable to your adapter or tablet’s HDMI-compatible port.
- Turn on the projector and set it to the correct HDMI input source.
Some tablets may require you to allow screen sharing from display settings.
Step 4: Adjust Display Settings (if needed)
On some tablets:
- Go to Settings > Display > HDMI Output or Display Options.
- Choose whether to duplicate (mirror) or extend your screen.
Some tablets automatically mirror the display once HDMI is connected.
Common Problems and Solutions
Facing issues? Try these quick solutions:
| Problem | Solution |
| No signal on projector | Check cable/adapters and input source |
| Tablet not detecting HDMI | Restart tablet and reconnect |
| No audio output | Check if audio is set to play through HDMI |
| Flickering screen | Try using a higher-quality adapter or different HDMI cable |
How to Connect TV to Projector with HDMI?
Many people want to connect their TV to a projector for a larger screen viewing experience, especially during movie nights or sports events.
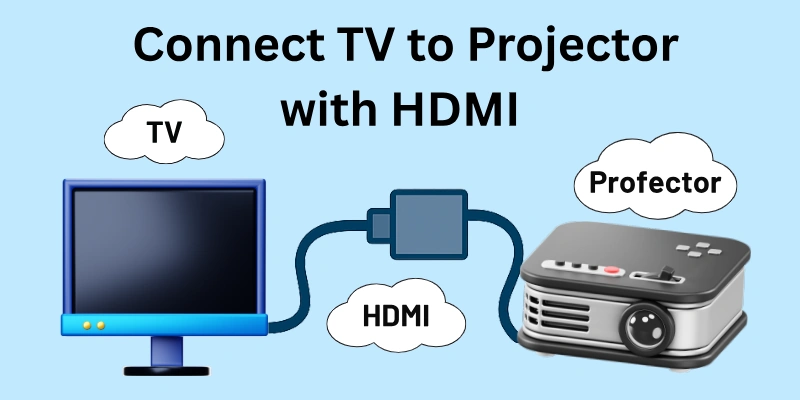
However, this connection can be a bit tricky because not all TVs support HDMI output — and that’s the key point to understand.
Why Connect TV to Projector with HDMI?
- To mirror or extend your TV display onto a projector screen.
- To enjoy a bigger display for a cinematic experience.
- For gaming or presentations in larger spaces.
But remember: TVs are usually input-only devices, meaning they take HDMI signals in, not send them out.
Step 1: Check HDMI Ports (Input or Output)
- Projectors have HDMI input ports — they receive signals.
- Most TVs also have HDMI input ports only, not HDMI output.
So, connecting a TV directly to a projector may not work, because you need a source device with HDMI OUT, and TVs usually don’t have that.
Step 2: Use a Source Device Between TV and Projector
To make this setup work, use a device that outputs HDMI signals, such as:
- Set-top box
- Streaming devices (like Fire TV Stick, Roku, Chromecast)
- Media players or gaming consoles
Here’s how you can do it:
- Connect your media source to projector via HDMI.
- Use TV speakers (if projector has no audio) or external sound systems.
- In some advanced setups, you can route the signal through an AV receiver or HDMI splitter.
Alternative Option: HDMI Splitter or AV Receiver
If you want to show the same signal on both TV and projector, you can use:
- HDMI Splitter – Sends signal from one source to two outputs.
- AV Receiver – Central hub for audio and video devices.
Key Points to Remember
Donot forget:
| Tip | Description |
| HDMI direction matters | HDMI OUT sends signal, HDMI IN receives |
| TVs usually don’t have HDMI OUT | So TV-to-projector connection may not work directly |
| Use a media source or HDMI splitter | It’s the easiest way to share content with both devices |
How to Connect Streaming Devices to Projector via HDMI?
Streaming devices have become very popular for watching content online. You can easily connect these devices to your projector using an HDMI connection, just like you connect them to a TV.
1. How to Connect Roku to Projector with HDMI
- Plug the Roku device’s HDMI connector into the projector’s HDMI port.
- Power the Roku using the USB cable (via projector USB port or a power adapter).
- Switch your projector’s input source to HDMI.
- Set up Roku using the on-screen instructions.
If your projector has no audio output, use a Bluetooth speaker or HDMI audio extractor for sound.
2. How to Connect Firestick to Projector with HDMI
- Plug the Amazon Fire TV Stick into the projector’s HDMI port.
- Use the USB power cable to power the Firestick.
- Change projector input source to HDMI.
- Complete setup using your Firestick remote and Wi-Fi.
You can pair wireless speakers for better audio output if the projector lacks a speaker.
3. How to Connect Android TV Box to Projector with HDMI
- Connect an HDMI cable from Android TV Box to projector’s HDMI port.
- Power the Android TV Box and switch the projector input to HDMI.
- Set up the Android TV Box using the remote.
This setup works like a smart TV interface on your projector screen.
4. How to Connect Chromecast to Projector with HDMI
Chromecast works best with a TV, but you can connect it to a projector too:
- Plug Chromecast into the HDMI port of the projector.
- Power the device using USB.
- Switch projector source to HDMI.
- Use your phone/laptop to cast content wirelessly using apps like YouTube, Netflix, etc.
If your projector has no HDMI port, use an HDMI to VGA adapter with audio out.
Alternative: Wireless Streaming Options
If your projector supports wireless screen mirroring, you can cast directly without HDMI:
- Miracast (for Android/Windows devices)
- Apple AirPlay (for iOS/Mac)
- Wi-Fi-enabled projectors
But HDMI still gives more stable video and audio quality.
Quick Tips for Better Experience
Follow up:
| Tip | Explanation |
| Use high-quality HDMI cable | For a stable connection |
| Ensure device is powered | Some projectors may not power USB properly |
| Use Bluetooth or external speaker | If projector has low or no sound |
| Keep remote controls handy | For easy navigation of streaming platforms |
How to Connect DVD Player or Blu-ray Player to Projector?
If you want to enjoy movies on a big screen using your DVD or Blu-ray player, connecting it to your projector via HDMI is the easiest way.
1. Standard HDMI Connection
- Take an HDMI cable and connect one end to the HDMI OUT port on your DVD or Blu-ray player.
- Plug the other end into the HDMI IN port of the projector.
- Turn on both devices.
- On your projector, select the correct HDMI input source using the remote or control panel.
- The video from your DVD/Blu-ray player should now display on the projector screen.
This setup works for standard DVD players and modern Blu-ray players.
2. Audio Setup Tips
Most projectors do not have high-quality speakers. For better sound, use one of these options:
- Connect external speakers directly to the DVD/Blu-ray player via audio out port.
- Use an HDMI audio extractor to split video and audio — send video to the projector and audio to speakers.
- Use a home theater system if available for a cinematic experience.
Tip: Check if your DVD or Blu-ray player supports surround sound or stereo output options.
How to Connect Gaming Consoles to Projector with HDMI?
If you love playing games on a big screen, you can easily connect your gaming console to a projector using an HDMI cable. Whether you use a PlayStation, Xbox, or Nintendo Switch, the process is almost the same.
1. PlayStation / Xbox / Nintendo Setup
- Take an HDMI cable and connect it to the HDMI OUT port of your console.
- Connect the other end of the cable to the HDMI IN port on your projector.
- Turn on both the projector and the gaming console.
- Select the correct HDMI input source on the projector using the remote or control buttons.
- You will now see the gaming screen on the projector.
Works for PlayStation 4/5, Xbox One/Series X/S, and Nintendo Switch (in Dock Mode).
2. Enable Game Mode in Projector
- Many modern projectors come with a special feature called Game Mode.
- This mode helps improve screen response time and reduces input lag.
- Turn on Game Mode from your projector’s settings menu.
Tip: If your projector doesn’t have a Game Mode, check for any other setting like Low Latency Mode or Fast Input.
3. Lag Reduction Tips for Smooth Gaming
- Always use a high-quality HDMI cable (High-Speed or 2.0/2.1).
- Keep the cable length short (under 10 feet if possible) to reduce signal delay.
- Make sure your console’s output resolution matches the projector’s native resolution (e.g., 1080p or 4K).
- Avoid using adapters unless necessary — direct HDMI connection is always better for gaming.
How to Connect Soundbar or Speakers to Projector via HDMI?
Projectors often lack powerful speakers, so connecting a soundbar or external speakers is a great idea for a better sound experience. Here’s how you can do it using HDMI or other options.
1. Using HDMI ARC (Audio Return Channel)
- Check if your projector has an HDMI ARC port.
- Connect one end of the HDMI cable to the HDMI ARC port on the projector.
- Connect the other end to the HDMI ARC or HDMI IN (ARC) port on your soundbar or AV receiver.
- Turn on both devices and enable HDMI ARC or CEC settings from the projector and soundbar menu.
- Now, the projector will send audio back to the soundbar via the same HDMI cable.
Note: HDMI ARC allows both audio and video signals to pass through a single HDMI cable.
2. If Your Projector Doesn’t Have HDMI ARC
If your projector lacks HDMI ARC, try these alternative audio setups:
Use Audio Out Port:
- Most projectors have a 3.5mm audio out jack or RCA audio output.
- Connect it to your soundbar’s AUX IN port using an auxiliary cable.
Use Optical (SPDIF) or Coaxial Output:
- Some projectors support digital audio output (optical or coaxial).
- Connect it to a compatible soundbar using the right cable.
HDMI Audio Extractor (Splitter):
- Use an HDMI audio extractor if your projector has no audio output.
- This device splits the audio signal from the HDMI input and sends it separately to your soundbar via AUX, optical, or RCA.
3. Troubleshooting Sound Issues
- Ensure HDMI cables are fully inserted and undamaged.
- Check if the sound output setting on the projector is set to HDMI ARC or external speaker.
- Restart all devices after connection.
- Try different HDMI ports if ARC isn’t working.
- Make sure CEC (Consumer Electronics Control) is enabled if required for ARC.
Tip: Adjust audio delay/sync settings if sound doesn’t match the video.
How to Connect Multiple Devices to Projector via HDMI?
If you use a projector for multiple purposes like watching movies, playing games, or giving presentations, you might want to connect several devices at once—like a laptop, gaming console, streaming stick, or DVD player.
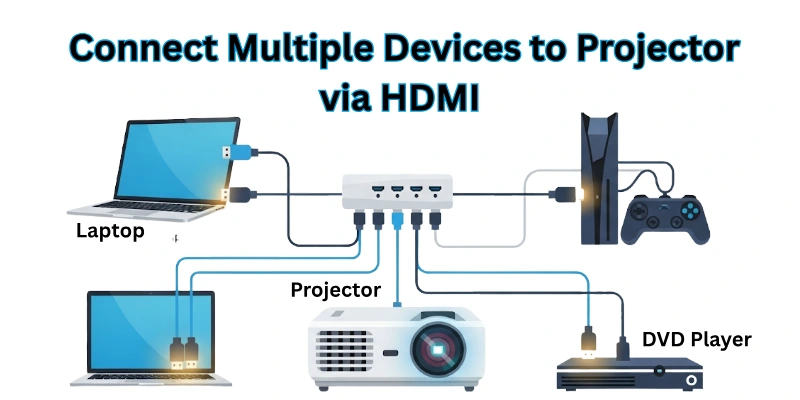
Since most projectors have only one HDMI port, you’ll need a little help from an HDMI switch.
1. Use an HDMI Switch (Not a Splitter)
- An HDMI switch allows you to connect multiple devices to one projector through a single HDMI input.
- It has multiple HDMI input ports and one HDMI output port.
- You connect your devices to the input ports and the output goes to the projector.
Example:
- HDMI Input 1 → Laptop
- HDMI Input 2 → Firestick
- HDMI Input 3 → DVD Player
- HDMI Output → Projector
Now, you can switch between these devices easily.
2. Automatic vs Manual HDMI Switching
Just look it up:
Automatic HDMI Switch:
- It automatically switches to the device that is powered on.
- Useful if you don’t want to press buttons manually.
Manual HDMI Switch:
- You press a button on the switch or use a remote control to change the source.
- More reliable if multiple devices are connected at the same time.
3. Recommended HDMI Switch Options
Here are some popular and reliable HDMI switches for smooth performance:
| HDMI Switch | Ports | Features |
| Kinivo 501BN | 5 In / 1 Out | Remote control, auto switching |
| UGREEN HDMI Switch 3-Port | 3 In / 1 Out | Manual switch, compact design |
| Zettaguard 4K HDMI Switch | 4 In / 1 Out | Picture-in-Picture (PIP) mode, remote |
| GANA HDMI Switch | 3 In / 1 Out | Budget-friendly, simple use |
Tip: Always choose a switch that supports 4K or 1080p resolution and HDCP compatibility for best performance.
4. What About HDMI Splitters?
- HDMI splitters are different. They send one HDMI source to multiple displays, not the other way around.
- So if your goal is to connect multiple devices to one projector, use an HDMI switch, not a splitter.
What If Your Projector Doesn’t Have an HDMI Port?
Not all projectors have an HDMI port—especially older models. But don’t worry! You can still connect your devices by using other ports and adapters.
1. Check What Ports Your Projector Has
Here are some common ports you might find instead of HDMI:
| Port Type | Description | Device Support |
| VGA (Blue Port) | For video only (no sound) | Older laptops, desktops |
| USB Port | Sometimes supports screen mirroring or media files | Laptops, smartphones |
| DVI Port | Video only, like VGA but better quality | Some older PCs and graphics cards |
| Composite AV (Red, Yellow, White) | For analog video/audio | DVD players, old gaming consoles |
| S-Video Port | Analog video only | Older DVD players or projectors |
2. Use Adapters or Converters
If your device has HDMI, but your projector does not, you can use a converter to make them compatible.
| Device → Projector | Use This Adapter |
| HDMI → VGA | HDMI to VGA Adapter |
| HDMI → DVI | HDMI to DVI Converter |
| USB-C → VGA | USB-C to VGA Adapter (for modern laptops/phones) |
| Lightning → VGA | Apple Lightning to VGA Adapter (for iPhones/iPads) |
Note: VGA and DVI do not carry audio, so you’ll need to connect speakers separately.
3. Connecting via USB (if supported)
Some modern projectors allow screen sharing directly via USB cable, especially if they come with their own software or smart projector functions.
- Check your projector’s user manual.
- Install drivers/software on your device (if required).
- Choose USB as the input source on the projector.
Wireless Alternatives to HDMI Connection
If you don’t want to use long cables or your projector is placed far from your device, you can connect it wirelessly. There are many easy and smart ways to do this without using HDMI cables.
1. Wireless HDMI (HDMI Extender Kits)
Wireless HDMI transmitters and receivers send audio and video signals from your laptop, PC, or TV to the projector without cables. How it works:
- Plug the transmitter into your device’s HDMI port.
- Plug the receiver into the projector’s HDMI port.
- Power both devices.
- Signals will be sent wirelessly.
2. Screen Mirroring via Wi-Fi or Apps
Many smart projectors or wireless-capable projectors support screen mirroring via Wi-Fi.
- For Android phones/tablets: Use Screen Cast, Smart View, or Miracast.
- For Windows laptops: Use “Project to this PC” or “Connect” app.
- For iPhone/iPad: Use AirPlay, if your projector supports it.
Steps:
- Make sure both your device and projector are connected to the same Wi-Fi.
- Open screen mirroring or cast feature on your device.
- Select the projector name to start mirroring.
3. Wireless Dongles (Miracast, Anycast, Chromecast, etc.)
If your projector is not smart, you can still make it wireless using a dongle.
| Dongle Type | How It Works | Best For |
| Miracast Dongle | Works with Android/Windows | Android phones, laptops |
| Anycast Dongle | Works with Android, Windows, iOS (some models) | Phones and tablets |
| Google Chromecast | Use Google Home App | All smart devices |
| Apple TV | For AirPlay from iOS devices | iPhones, iPads, MacBooks |
Just plug the dongle into projector’s HDMI port, connect it to power, and cast/mirror from your device.
Conclusion
In this article, we explained how to connect HDMI to a projector using different devices like laptops, phones, tablets, TV, MacBook, iPhone, iPad, DVD players, gaming consoles, soundbars, and more. Whether you use a direct HDMI cable, adapter, or wireless method, setting up your projector is simple when you choose the right cable or connection type.
Remember:
- Always check what ports your device and projector support.
- Use proper adapters if your device doesn’t have an HDMI port.
- For a neat setup, wireless options like HDMI extenders or screen mirroring work great.
No matter which device you use, there’s always a way to connect it to your projector easily! Try the method that suits your device best and enjoy smooth viewing at home, office, or classroom.
We’d Love to Hear From You!
- Have questions about your specific device or setup?
- Drop your queries in the comments below — we’re here to help!
- Or share which method worked best for you.
FAQs
Here are some of the most commonly asked questions related to “ How to Connect HDMI to Projector”:
Make sure the HDMI cable is connected properly to both devices. Check if you selected the correct HDMI input source on the projector. Try using a different HDMI cable or port. Also, restart both the projector and your device.
Yes, you can use other ports like VGA, AV, or USB-C. You can also use a wireless method like screen mirroring. Some projectors support wireless dongles. Use an adapter if your device doesn’t have HDMI.
You need an HDMI adapter that fits your phone (USB-C or Lightning). Connect your phone to the adapter, then plug in the HDMI cable. Connect the other end to the projector. Select the HDMI source on your projector.
Connect your laptop and projector with an HDMI cable. Select the correct HDMI input on the projector. On your laptop, press Windows + P and choose Duplicate or Extend screen. The projector will start showing your screen.
A standard HDMI cable works for most devices. For phones or tablets, you may need mini or micro HDMI or an adapter. Make sure the cable length is suitable for your setup. Use a good-quality cable for better results.
No, older projectors may only have VGA or AV ports. Most modern projectors come with HDMI ports. Always check the input ports before buying cables. You can use adapters if your projector doesn’t support HDMI.
Use a USB-C to HDMI adapter for newer MacBooks. Plug the adapter into your MacBook and then connect the HDMI cable. Select the HDMI input on the projector. Your MacBook screen will appear on the projector.
Yes, you can use an HDMI switch to connect multiple devices. It allows you to switch between devices easily. Just connect one output to the projector and multiple inputs from your devices. Choose the device you want to display.
Yes, if your projector has HDMI ARC (Audio Return Channel). Connect the soundbar to the ARC port. If not, use an audio extractor or connect the soundbar directly to your source device. Always check sound settings.
Yes, you can use wireless HDMI transmitters or dongles like Chromecast or Miracast. They send the signal without a cable. Just plug the dongle into your projector and connect your device wirelessly. It’s a simple and clean setup.


- Be Respectful
- Stay Relevant
- Stay Positive
- True Feedback
- Encourage Discussion
- Avoid Spamming
- No Fake News
- Don't Copy-Paste
- No Personal Attacks
- Be Respectful
- Stay Relevant
- Stay Positive
- True Feedback
- Encourage Discussion
- Avoid Spamming
- No Fake News
- Don't Copy-Paste
- No Personal Attacks
