Change HDMI on Different TV Brands: Quick Setup Guide
Published: 15 Aug 2025
If you’re wondering how to change HDMI on TV, you’re not alone. Many people face this problem, especially when the remote is lost or not working. Sometimes, the TV buttons are confusing, or the menu is hard to understand.

In this guide, you will learn simple and easy methods to switch HDMI input on any TV — with or without a remote, for all major TV brands.
Let’s explore how to change HDMI on TV in detail:
General Methods to Change to HDMI on Any TV
If you’re unsure how to change HDMI on TV, don’t worry — there are many easy ways to do it, even if you don’t have the original remote.
Below are some common and effective methods you can try on almost any TV brand.
Method 1: Using the TV Input/Source Button
Most TVs have a button labeled “Input” or “Source” either on the remote or on the TV body itself.
- Press this button to open the input menu on the screen.
- Use the arrow buttons or volume/channel buttons to scroll through the options.
- Select HDMI from the list to switch the input.
This is one of the easiest methods if your TV still has working buttons.
Method 2: Using a Universal Remote
If you don’t have the original remote, you can use a universal remote.
- Set it up by following the instruction manual or using the correct code for your TV brand.
- Press the “Input” or “Source” button to choose HDMI.
This method works well for almost all TV models.
Method 3: Using TV Control Buttons (Physical Buttons on TV)
Many TVs have physical buttons located on the side, bottom, or back.
- These buttons can control volume, channels, menu, and input settings.
- Press the “Menu” or “Source” button and use other buttons to navigate to HDMI input.
It may take a bit of trial and error, but it works if there is no remote.
Method 4: Using Mobile Apps as Remote
If you have a Smart TV, you can use your smartphone as a remote by downloading the TV brand’s official remote app.
Examples:
- LG TV: LG ThinQ app
- Samsung TV: SmartThings app
- Android TV: Google TV app
Once connected, you can use the app to open the input menu and select HDMI.
Method 5: Using HDMI Auto-Detection (Plug & Play)
Some TVs automatically detect a device when it’s connected via HDMI.
- Just plug in your laptop, set-top box, game console, or Fire Stick into the HDMI port.
- The TV may auto-switch to HDMI input without you doing anything manually.
Note: This feature depends on your TV’s model and settings.
Method 6: Using External Devices That Auto-Switch Input
Streaming devices like Amazon Fire Stick, Roku, or Chromecast sometimes auto-switch the TV input when you plug them in.
- Turn off your TV, plug in the device, and turn it back on.
- Many TVs automatically change to HDMI when they detect these devices.
This is a smart workaround if you have no remote and want an instant switch.
How to Change HDMI on Different TV Brands – With and Without Remote
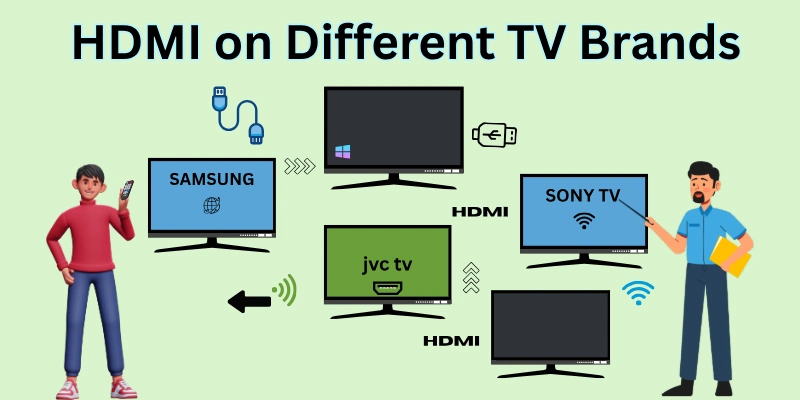
Here’s how to change HDMI on TV for all popular brands.

Whether you have the remote or not, you can still switch your TV to HDMI using simple methods.
1. LG TV
Here is how to change to HDMI on LG TV without remote and with remote:
- With Remote: Press the Input or Home button and select HDMI.
- Without Remote: Use the joystick-style control button on the TV, try the LG ThinQ app, or use a universal remote.
2. Samsung TV
Here is how to change HDMI on Samsung TV with and without remote:
- With Remote: Press the Source button and choose HDMI.
- Without Remote: Use the control stick (usually at the bottom or back), try the SmartThings app, or use a universal remote.
3. Sony TV
Here is how to change HDMI on Sony TV with and without remote:
- With Remote: Press the Input button and select HDMI.
- Without Remote: Use the physical menu button, try the Sony TV Remote App, or use a universal remote.
4. Vizio TV
Here is how to change HDMI on Vizio TV with and without remote:
- With Remote: Press the Input button and select HDMI.
- Without Remote: Use TV buttons to navigate, try the Vizio SmartCast App, or use HDMI auto-switching from connected devices.
5. Hisense TV
Here is how to change HDMI on Hisense TV with and without remote:
- With Remote: Press the Input or Source button to choose HDMI.
- Without Remote: Use physical buttons on the TV, try the RemoteNOW app, or use a universal remote.
6. TCL TV
Here is how to change HDMI on TCL TV with and without remote:
- With Remote: Go to Home > Inputs > HDMI.
- Without Remote: Use the TCL Roku mobile app, control button on the TV, or auto HDMI switching.
7. Panasonic TV
Here is how to change HDMI on Panasonic TV with and without remote:
- With Remote: Press the AV/Input button and choose HDMI.
- Without Remote: Use side or bottom panel buttons, or use a universal remote.
8. JVC TV
Here is how to change HDMI on JVC TV without remote and with remote:
- With Remote: Press the Input or Source button and select HDMI.
- Without Remote: Use TV panel buttons, try the JVC TV Remote App (for smart TVs), or use a universal remote.
9. Magnavox TV
Here is how to change to HDMI on Magnavox TV without remote and with remote:
- With Remote: Press the Source/Input button and choose HDMI.
- Without Remote: Use TV control buttons, a universal remote, or try auto input detection when plugging in a device.
10. Philips TV
Here is how to change HDMI on Philips TV with and without remote:
- With Remote: Press the Source button and select HDMI.
- Without Remote: Use the physical control button on the TV or try the Philips TV Remote App.
11. Sharp TV
Here is how to change HDMI on Sharp TV with and without remote:
- With Remote: Press the Input or Source button and pick HDMI.
- Without Remote: Use physical buttons on the TV or try the Sharp TV Remote App.
12. Toshiba TV
Here is how to change HDMI on Toshiba TV with and without remote:
- With Remote: Press the Source or Input button to select HDMI.
- Without Remote: Use side panel buttons, or try the Toshiba TV Remote App.
Using Mobile Apps as Remote (Smart TV Only)
If your TV is a Smart TV, you can use your mobile phone as a remote control. Many TV brands have their own official remote control apps, which work just like the original remote.
Here’s how it works:
- Connect your phone and TV to the same Wi-Fi network: This is very important. The app won’t work if your phone and TV are not on the same internet connection.
- Download the right app for your TV brand: Every brand has its own app. You can install it from the Google Play Store or Apple App Store.
- LG TV → Use the LG ThinQ app
- Samsung TV → Use the SmartThings app
- Vizio TV → Use the Vizio SmartCast app
- TCL TV → Use the TCL Roku Remote app
- Hisense TV → Use the RemoteNOW app
- Open the app and pair it with your TV: Most apps will automatically detect your TV. Select your TV from the list, and follow the simple instructions to connect.
- Use the app’s buttons just like your remote: Once connected, you will see buttons like Input, Home, Volume, Navigation Arrows, etc. Tap on the Input or Source button in the app, and change it to HDMI easily.
Universal Remote Apps (Work on Many TV Brands)
If your TV is older or doesn’t support the brand’s official app, you can try using a universal remote control app. These apps work with many TV models (but not all).
- AnyMote
- Google TV App
- Roku App (works with Roku TVs and Roku devices)
These apps may work via Wi-Fi or Infrared (IR). So, your phone should have IR blaster (if Wi-Fi is not supported by TV).
Tip: Always check if your TV is compatible with the app. Not all TVs support mobile remote apps, especially if they are not Smart TVs.
HDMI Auto Switching – Does It Work?
Some modern TVs can automatically switch to the correct HDMI input when you turn on a connected device like a Fire Stick, PS5, or Chromecast. This feature is called HDMI Auto Switching or HDMI-CEC.
- HDMI Auto Switching means your TV will change to the right HDMI port by itself when a device turns on.
- It only works if both your TV and HDMI device support HDMI-CEC.
- For example, if you turn on your Fire Stick, the TV will automatically switch to the HDMI port where Fire Stick is plugged in.
What is HDMI-CEC?
HDMI-CEC stands for HDMI Consumer Electronics Control. It is a feature that lets your TV and connected devices talk to each other using the HDMI cable.
- HDMI-CEC allows one device to control another (like TV remote controlling Fire Stick).
- It also helps in auto input switching when a device turns on.
- HDMI-CEC must be enabled manually in most TVs from the settings menu.
How Devices Like Fire Stick, PS5, or Chromecast Switch HDMI Automatically
- These devices support HDMI-CEC, so when you turn them on, they send a signal to the TV to switch to the correct HDMI port.
- You don’t need to press any button if HDMI-CEC is enabled.
- This works best when only one HDMI device is active at a time.
How to Enable HDMI-CEC on Your TV (Brand-Wise)
Each brand uses a different name for HDMI-CEC. Here’s how to enable it:
- LG TV – Go to Settings > General > Simplink (HDMI-CEC) > Turn it ON
- Samsung TV – Settings > General > Anynet+ (HDMI-CEC) > Turn it ON
- Sony TV – Settings > External Inputs > Bravia Sync > Enable it
- Vizio TV – Settings > System > CEC > Enable CEC
- Hisense TV – Settings > Inputs > HDMI Control (CEC) > Turn it ON
- TCL TV (Roku) – Settings > System > Control Other Devices (CEC) > Check all boxes
- Philips TV – Settings > HDMI > EasyLink > Turn it ON
- Panasonic TV – Settings > HDMI > Viera Link > Enable it
- Sharp TV – Settings > Input > Aquos Link (HDMI-CEC) > Turn it ON
- Toshiba TV – Settings > HDMI Settings > Regza Link (HDMI-CEC) > Enable it
Alternative Solutions If None Work
If you still cannot change to HDMI on your TV, don’t worry. Here are some other easy solutions you can try:
- Buy a universal remote – It is cheap, easy to find, and works with most TVs.
- Get an original replacement remote – You can order the same remote model from online shops.
- Use an HDMI switch box – It comes with its own remote, so you can easily change between HDMI inputs.
- Upgrade your TV – Choose a Smart TV model that supports mobile remote control apps.
Conclusion
Now that you’ve learned how to change HDMI on TV, you’re all set to connect your favorite devices without hassle. Whether it’s using TV buttons, a mobile app, or even a universal remote, the solutions are simple and practical for every brand. We hope this guide has made things clearer and more convenient for you.
But if you are still unsure about something? Head over to the FAQs section below for quick tips and troubleshooting answers.
FAQs
Here are some of the most commonly asked questions related to “How to Change HDMI On TV”:
Some TVs have different button names or hidden menus. Try checking your TV’s side or bottom for a menu or settings button. Press it and navigate to “Input” or “Source” using volume or channel buttons. You can also use a universal remote or mobile app. These options can help you reach the HDMI input.
Yes, many older TVs have physical buttons for input change. Look for buttons labeled “Menu”, “Input”, or “Source” on the TV. Use volume or channel buttons to move through the options. If not available, a universal remote is the best option. It works easily and costs very little.
Auto switching only works if your TV and device support HDMI-CEC. You may need to enable it in your TV settings. Different brands call it by different names like Simplink, Anynet+, or Bravia Sync. Also, make sure the HDMI cable is plugged in properly. If it still doesn’t work, you’ll need to switch HDMI manually.
A universal remote is a remote that works with many TV brands. You can buy it online or at any electronics shop. It comes with a guide to pair it with your TV model. Once paired, you can use it like your original remote. It’s an easy and affordable solution.
Yes, if your TV is a smart TV, you can use its official remote app. For example, LG has ThinQ, Samsung uses SmartThings, and Vizio uses SmartCast. You need to connect your phone and TV to the same Wi-Fi. Once connected, you can control HDMI input through the app.
HDMI-CEC lets your TV and connected devices work together using the HDMI cable. It helps your TV switch input automatically when a device turns on. It also allows your TV remote to control other devices. It’s a useful feature, but not required. Manual input change still works fine.
Look at the back or side of your TV—each port is labeled like HDMI1, HDMI2, etc. Plug your device into any port and remember the number. Then select the same HDMI number on your TV input menu. For example, if your device is in HDMI2, choose HDMI2 from the menu.
Some modern TVs have only one joystick-style button or no buttons. Try pressing and holding the power button—it may open the input menu. If not, your best option is a mobile app or universal remote. These tools make HDMI switching easier in such cases.
Yes, some smart TVs support voice assistants like Alexa or Google Assistant. You can say, “Switch to HDMI1” if the feature is enabled. Check your TV’s settings to turn on voice control. Not all models support this, so check your TV’s manual or support page.
Both work fine. A universal remote is cheaper and works with many brands. A replacement original remote may give better control for your exact TV model. If you only need basic functions like HDMI switching, a universal remote is enough. Choose what suits your budget and need.

- Be Respectful
- Stay Relevant
- Stay Positive
- True Feedback
- Encourage Discussion
- Avoid Spamming
- No Fake News
- Don't Copy-Paste
- No Personal Attacks

- Be Respectful
- Stay Relevant
- Stay Positive
- True Feedback
- Encourage Discussion
- Avoid Spamming
- No Fake News
- Don't Copy-Paste
- No Personal Attacks


